
Build Your Own Flood Control Model
Learn about flood control through this hands-on activity
Want to print this page? You can download and print our project guide here!
Background
One of the best ways to learn about flood control is to try it for yourself! This activity is great for kids to do with a parent/guardian or with a group in a classroom setting. Follow the steps below to complete this flood control craft!
The goal
This model should illustrate flood control principles and protect the high ground with schools, businesses, etc. from flooding. Rainfall will be simulated by pouring water on the model with a watering can, colander, or something similar.
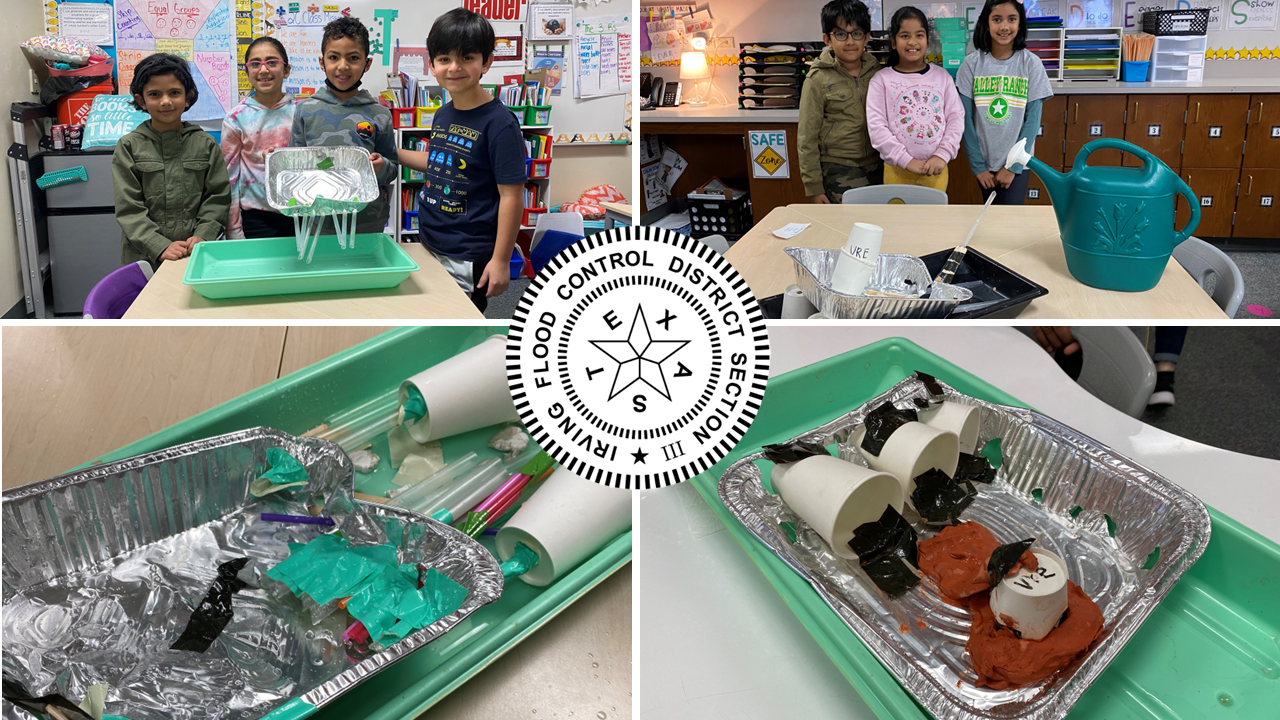
Use the reference image below if you’d like to build a flood control system like Valley Ranch, with the houses on the high ground and a canal to transport water away in a valley. Or, feel free to experiment and design your own flood control system!

Materials
To build your own flood control system, you’ll need the following materials:
Base container approximately 9”x13” (we recommend a disposable aluminum baking pan)
1-2 pounds of air-dry clay
1 roll of Duct tape
6 Popsicle sticks
3 Drinking straws
7 Fat bubble tea straws
3 paper or plastic cups
A pair of scissors
Materials can be added or substituted as desired.
Instructions
Begin by designing a flood control system with the goal of keeping water away from high ground (where houses, businesses, and schools would be located). We recommend sketching a few different designs on paper before beginning to build the model. Note: If you want to learn about flood control principles, visit our IFCD 3 for Kids page for educational resources.
Take your baking pan or another container and set it on a flat surface. This container will serve as the base for your model.
Begin to build your design using the supplies you’ve collected. Use air-dry clay to form your desired landscape and use tools like the straws and popsicle sticks to form walls and pipes to channel the water from the houses. Don’t be afraid to be creative!
Once you’ve completed your model, we recommend letting the clay dry before testing the model.
Now it’s time to test the model! Move it to the desired testing area or set it inside a larger container to collect excess water.
Once this is done, gather your water and pour it over the model. We recommend using a watering can or colander so you can diffuse the water, so it mimics rain. Note: If you don’t have a watering can or colander available, you can also ask an adult to poke small holes in a plastic water bottle and fill it with water to mimic rainfall.
As the “rain” is falling on your model, pay attention to where it goes and note whether your flood control methods kept the buildings/elevated areas safe from flooding. See the next page for an official evaluation form.
Optional: If you’d like to apply your learnings, use additional supplies to tweak your design, or create a new design, to try to create an even more flood-safe community.
Evaluation Form
Name/Group Name: ________________________
Did the model withstand the impact of rain? Y / N
Did the water drain from the model? Y / N
How did the model protect the community from flooding?
What did the student(s) feel was the most successful part of their model?
If the student(s) did the project again, what would they change about their model?